オーストラリアの道路標識
道路標識 > オーストラリアの道路標識

オーストラリアの道路標識は、州によって異なる点もあるが、国全体で統一されており、日本と同様、道路標識及び信号に関するウィーン条約は批准していない[1]。
規制標識
規制標識は道路利用者に交通法規を示す。道路利用者は規制標識による指示に従わなければ罰金や免許証からポイントが減点される可能性がある[2]。
-
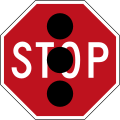
 (R1-1) 一時停止
 -
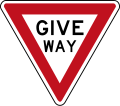 (R1-2) ゆずれ
 -
 (R1-3) ゆずれ(ラウンドアバウト)
 -
 (R1-4) 信号機消灯・点滅時一時停止(ニューサウスウェールズ州)
 -
 (R1-V6) 家畜優先(ビクトリア州)
 -
 (R2-2) 一方通行(左)
 -
 (R2-2) 一方通行(右)
 -
 (R2-3) 左走れ
 -
 (R2-3) 右走れ
 -
 (R2-4) 進入禁止(オーストラリア首都特別地域、ニューサウスウェールズ州、ノーザンテリトリー以外)
 -
 (R2-4) 進入禁止(オーストラリア首都特別地域、ニューサウスウェールズ州、ノーザンテリトリー)
 -
 (R2-5) 転回禁止(オーストラリア首都特別地域、ニューサウスウェールズ州、ノーザンテリトリー以外)
 -
 (R2-5) 転回禁止(オーストラリア首都特別地域、ニューサウスウェールズ州、ノーザンテリトリー)
 -
 (R2-6) 左折禁止(オーストラリア首都特別地域、ニューサウスウェールズ州、ノーザンテリトリー以外)
 -
 (R2-6) 左折禁止(オーストラリア首都特別地域、ニューサウスウェールズ州、ノーザンテリトリー)
 -
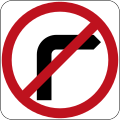 (R2-6) 右折禁止 (オーストラリア首都特別地域、ニューサウスウェールズ州、ノーザンテリトリー以外)
 -
 (R2-6) 右折禁止 (オーストラリア首都特別地域、ニューサウスウェールズ州、ノーザンテリトリー)
 -
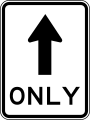 (R2-7) 直進せよ
 -
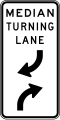
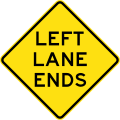
 (R2-9) 左車線は左折専用レーン
 -
 (R2-9) 右車線は右折専用レーン
 -
 (R2-10) 歩行者に道をゆずれ
 -
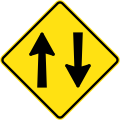
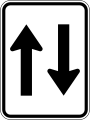 (R2-11) 対面通行
 -
 (R2-14) 左折せよ
 -
 (R2-14) 右折せよ
 -
 (R2-15) Uターン可
 -
 (R2-16) 常時左折可
 -
 (R2-17) 一方通行(前方)
 -
 (R2-19) 左車線は出口専用レーン
 -
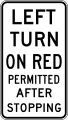 (R2-20) 赤信号時左折可
 -
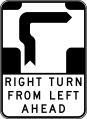
 (R2-21) 二段階右折せよ
 -
 (R2-V21-1) 二段階右折せよ(ビクトリア州、クイーンズランド州)
 -
 (R2-22) 自転車二段階右折禁止
 -
 (R2-V122) 交通島の左を走れ(ビクトリア州)
 -
 (R2-Q02) キープレフト(クイーンズランド州)
 -
 (R3-1) 横断歩道
 -
 (R3-1) 横断歩道(ターゲットボード付き)(クイーンズランド州)
 -
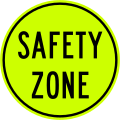 (R3-2) 安全地帯(オーストラリア首都特別地域、ニューサウスウェールズ州以外)
 -
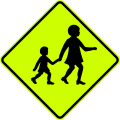
 (R3-3) 学童が横断する(学校周辺の横断歩道にこの旗が設置される)(ノーザンテリトリー以外)
 -
 (R3-3) 学童が横断する(学校周辺の横断歩道にこの旗が設置される)(ノーザンテリトリー)
 -
 (R3-4) 信号機点滅時学童横段につき制限速度25km/h
 -
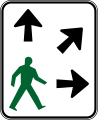 (R3-5) 斜め横断可(左)
 -
 (R3-5) 斜め横断可(右)
 -
 (R3-V102) 歩行者は横断歩道橋を使え(ビクトリア州)
 -
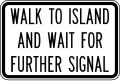 (R3-Q01) 交通島まで横断しさらに信号を待て(クイーンズランド州)
 -
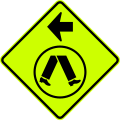
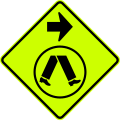
 (MR-RP-8) 横断禁止(西オーストラリア州)
 -
 (R4-1) 制限速度10km/h
 -
 (R4-1) 制限速度20km/h
 -
 (R4-1) 制限速度25km/h
 -
 (R4-1) 制限速度30km/h
 -
 (R4-1) 制限速度40km/h
 -
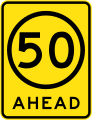
 (R4-1) 制限速度50km/h
 -
 (R4-1) 制限速度60km/h
 -
 (R4-1) 制限速度70km/h
 -
 (R4-1) 制限速度75km/h
 -
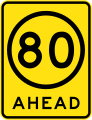
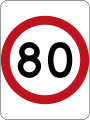 (R4-1) 制限速度80km/h
 -
 (R4-1) 制限速度90km/h
 -
 (R4-1) 制限速度100km/h
 -
 (R4-1) 制限速度110km/h
 -
 (R4-1) 制限速度130km/h
 -
 (R4-2) 速度制限解除
 -
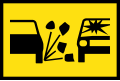
 (R4-3) 道路工事中
 -
 (R4-4) シェアドゾーン
 -
 (R4-5) シェアドゾーンここまで
 -
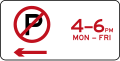
 (R4-6) ローカルトラフィックエリア
 -
 (R4-10) ゾーン20
 -
 (R4-10) ゾーン30
 -
 (R4-10) ゾーン40
 -
 (R4-10) ゾーン50
 -
 (R4-10) ゾーン60
 -
 (R4-11) ゾーン20ここまで
 -
 (R4-11) ゾーン30ここまで
 -
 (R4-11) ゾーン40ここまで
 -
 (R4-11) ゾーン50ここまで
 -
 (R4-11) ゾーン60ここまで
 -
 (R4-12) 10km/h制限ここまで
 -
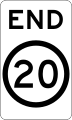 (R4-12) 20km/h制限ここまで
 -
 (R4-12) 25km/h制限ここまで
 -
 (R4-12) 30km/h制限ここまで
 -
 (R4-12) 40km/h制限ここまで
 -
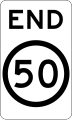 (R4-12) 50km/h制限ここまで
 -
 (R4-12) 60km/h制限ここまで
 -
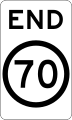 (R4-12) 70km/h制限ここまで
 -
 (R4-12) 75km/h制限ここまで
 -
 (R4-12) 80km/h制限ここまで
 -
 (R4-12) 90km/h制限ここまで
 -
 (R4-12) 100km/h制限ここまで
 -
 (R4-12) 110km/h制限ここまで
 -
 (R4-V100) 側道(ビクトリア州)
 -
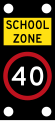
 (R4-V105) スクールゾーンにつき40km/h制限(ビクトリア州)
 -
 (R4-V105) スクールゾーンにつき60km/h制限(ビクトリア州)
 -
 (R4-V106) スクールゾーンにつき40km/h制限(ビクトリア州)
 -
 (R4-V106) スクールゾーンにつき60km/h制限(ビクトリア州)
 -
 (R4-V108) この先40km/h制限(ビクトリア州)
 -
 (R4-V108) この先50km/h制限(ビクトリア州)
 -
 (R4-V108) この先60km/h制限(ビクトリア州)
 -
 (R4-V108) この先70km/h制限(ビクトリア州)
 -
 (R4-V108) この先80km/h制限(ビクトリア州)
 -
 (R4-V111) この先速度規制あり(ビクトリア州、西オーストラリア州)
 -
 (R4-V119) New Limit(ビクトリア州)
 -
 (R4-201) 橋の上で(ニューサウスウェールズ州)
 -
 (R4-205) 州による速度規制(ニューサウスウェールズ州)
 -
 (R4-212) 道路工事につき20km/h規制(ニューサウスウェールズ州)
 -
 (R4-212) 道路工事につき40km/h規制(ニューサウスウェールズ州)
 -
 (R4-212) 道路工事につき60km/h規制(ニューサウスウェールズ州)
 -
 (R4-212) 道路工事につき80km/h規制(ニューサウスウェールズ州)
 -
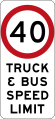 (R4-229) トラックとバスの速度規制(ニューサウスウェールズ州)
 -
 (R4-225-1) この先の制限速度(ニューサウスウェールズ州)
 -
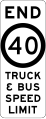 (R4-220)トラックとバスの速度規制ここまで(ニューサウスウェールズ州)
 -
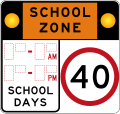
 (R4-230) スクールゾーンにつき通学時間帯速度規制(ニューサウスウェールズ州)
 -
 (R4-230-1) スクールゾーンにつき通学時間帯速度規制(ニューサウスウェールズ州)
 -
 (R4-231) スクールゾーンここまで(ニューサウスウェールズ州)
 -
 (R4-235) スクールゾーンにつき通学時間帯速度規制(ニューサウスウェールズ州)
 -
 (R4-235-1) スクールゾーンにつき通学時間帯速度規制(ニューサウスウェールズ州)
 -
 (R4-239) 非降雨時制限速度(ニューサウスウェールズ州)
 -
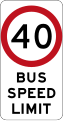 (R4-242) バスの制限速度(ニューサウスウェールズ州)
 -
 (R4-243) バスの速度規制ここまで(ニューサウスウェールズ州)
 -
 (R4-244-1) この先スクールゾーン(ニューサウスウェールズ州)
 -
 (R4-246) 車両区分別制限速度(ニューサウスウェールズ州)
 -
 (R4-Q01) スクールゾーンにつき通学時間帯速度規制 (クイーンズランド州)
 -
 (R4-Q03) この先スクールゾーンにつき速度規制あり (クイーンズランド州)
 -
 (R4-Q04) スクールゾーンにつき通学時間帯速度規制 (丁字路用) (クイーンズランド州)
 -
 (R4-Q05) ロードトレインの制限速度 (クイーンズランド州)
 -
 (R4-Q06) ロードトレインの制限速度ここまで (クイーンズランド州)
 -
 (R4-Q07) 病院エリア (クイーンズランド州)
 -
 (MR-RS-20) 速度規制エリアここまで (西オーストラリア州)
 -
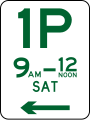 (R5-1) 指定時間駐車可:1時間まで
 -
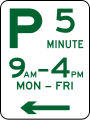
 (R5-2) 指定時間駐車可:2時間まで
 -
 (R5-10) 駐車可:無制限
 -
 (R5-12) 指定時間駐車可:2分まで
 -
 (R5-13) 指定時間駐車可:5分まで
 -
 (R5-14) 指定時間駐車可:10分まで
 -
 (R5-15) 指定時間駐車可:15分まで
 -
 (R5-16) 指定時間駐車可:30分まで
 -
 (R5-17) 指定時間駐車可:1時間半まで
 -
 (R5-20) バス駐車帯
 -
 (R5-21) タクシー駐車帯
 -
 (R5-22) 指定時間許可車両駐車帯
 -
 (R5-23) ローディングゾーン(旅客の乗降や荷下ろしなどを除き駐停車禁止)
 -
 (R5-24) トラック駐車帯
 -
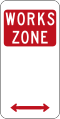 (R5-25) Works Zone
 -
 (R5-26) 郵便車駐車帯
 -
 (R5-35) 駐停車禁止
 -
 (R5-35) 駐停車禁止(オーストラリア首都特別地域)
 -
 (R5-36) 指定時間駐停車禁止
 -
 (R5-36) 通学時間帯駐停車禁止
 -
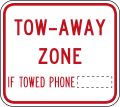
 (R5-39) レッカー移動エリア
 -
 (R5-40) 駐車禁止
 -
 (R5-40) 駐車禁止(オーストラリア首都特別地域)
 -
 (R5-41) 指定時間駐車禁止
 -
 (R5-45) クリアウェイ(バス・タクシーの乗降を除き駐停車禁止)
 -
 (R5-46) 指定クリアウェイ(バス・タクシーの乗降を除き駐停車禁止)
 -
 (R5-51) クリアウェイここまで
 -
 (R5-58) 非常駐車レーン
 -
 (R5-61) 指定時間2時間駐車可
 -
 (R5-62) 指定時間2時間駐車可
 -
 (R5-63) 2時間駐車可ここまで
 -
 (R5-64) この先駐車場
 -
 (R5-65) 枠内に駐車せよ
 -
 (R5-71) 指定時間駐停車禁止エリア
 -
 (R5-72) 指定時間駐停車禁止エリア
 -
 (R5-73) 駐停車禁止エリアここまで
 -
 (R5-81) 指定時間駐車禁止エリア
 -
 (R5-82) 指定時間駐車禁止エリア
 -
 (R5-83) 駐車禁止エリアここまで
 -
 (R5-V103) New Clearway Times(ビクトリア州)
 -
 (R5-V104) New Times(ビクトリア州)
 -
 (R5-400) 駐停車禁止(ニューサウスウェールズ州)
 -
 (R5-405) 駐停車禁止(タクシーを除く)(ニューサウスウェールズ州)
 -
 (R5-406) タクシー乗り場(ニューサウスウェールズ州)
 -
 (R5-Q01) レッカー移動エリア (クイーンズランド州)
 -
 (R5-Q04) ローディングゾーン(旅客の乗降や荷下ろしなどを除き駐停車禁止)(旅客の乗降は最大2分)(クイーンズランド州)
 -
 (R5-Q05) ローディングゾーン(旅客の乗降や荷下ろしなどを除き駐停車禁止)(商用車は最大20分)(クイーンズランド州)
 -
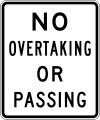 (R6-1) 追い越し禁止
 -
 (R6-2) 橋上につき追い越し禁止
 -
 (R6-3) 橋梁の重量制限
 -
 (R6-4) 重量制限
 -
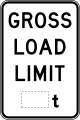
 (R6-5) End Load Limit
 -
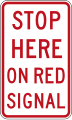 (R6-6) 赤信号時停車位置
 -
 (R6-7) 一時停止(手持ち用)(学童)
 -
 (R6-8) 一時停止(手持ち用)(道路工事)
 -
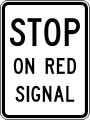 (R6-9) 赤信号時停車せよ
 -
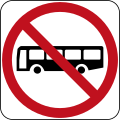 (R6-10-1) バス通行止め
 -
 (R6-10-2) トラック通行止め
 -
 (R6-10-3) 自転車通行止め
 -
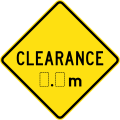
 (R6-11) 高さ制限
 -
 (R6-12) 高さ制限
 -
 (R6-13) 高速道路を通行できない車両
 -
 (R6-14) 赤矢印信号時停車位置
 -
 (R6-15) 歩行者通行止め
 -
 (R6-17) 橋梁の重量制限
 -
 (R6-18) バスはここで入れ( 重量と長さを確認するため検問所が設置されている)
 -
 (R6-19) 高速道路ここから
 -
 (R6-20) 高速道路入口
 -
 (R6-21) 高速道路ここまで
 -
 (R6-22) バスとトラックはギアを1速に入れよ
 -
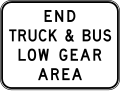 (R6-23) バスとトラック1速制限ここまで
 -
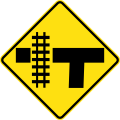
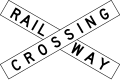 (R6-24) 踏切
 -
 (R6-25) 踏切(赤の背板付き)
 -
 (R6-27) トラックはここで入れ(重量と長さを確認するため検問所が設置されている)
 -
 (R6-28) トラックは左車線を走行せよ
 -
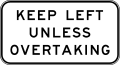 (R6-29) キープレフト
 -
 (R6-30) 相互右折車線
 -
 (R6-31) バス優先
 -
 (R6-32) キープレフトここまで
 -
 (R6-33) 全長制限
 -
 (R6-249) 雨天時制限速度
 -
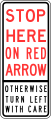 (R6-256) 赤矢印信号時停止位置
 -
 (R6-V106) トラック通行止めここまで(ビクトリア州)
 -
 (R6-Q01) 高速道路を通行できない車両 (クイーンズランド州)
 -
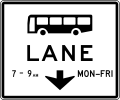
 (R7-1-1) バスレーン
 -
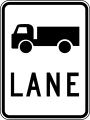 (R7-1-3) トラックレーン
 -
 (R7-1-4) 自転車レーン
 -
 (R7-2) この先
 -
 (R7-3) 左車線
 -
 (R7-4) ここまで
 -
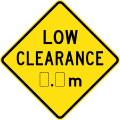
 (R7-5) Lane Clearance
 -
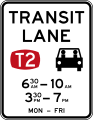
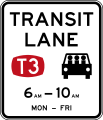
 (R7-7-1) トランジットレーン:2人(2人以上乗車していなければ通行できない)
 -
 (R7-7-2) トランジットレーン:3人(3人以上乗車していなければ通行できない)
 -
 (R7-7-3) 指定時間トランジットレーン:2人(2人以上乗車していなければ通行できない)
 -
 (R7-7-4) 指定時間トランジットレーン:2人(2人以上乗車していなければ通行できない)
 -
 (R7-7-5) 指定時間トランジットレーン:3人(3人以上乗車していなければ通行できない)
 -
 (R7-7-6) 指定時間トランジットレーン:3人(3人以上乗車していなければ通行できない)
 -
 (R7-8) バス専用
 -
 (R7-9-1) トランジェットレーンここまで
 -
 (R7-9-2) トランジェットレーンここまで
 -
 (R7-Q01) この先(左方向)(クイーンズランド州)
 -
 (R7-Q01) この先(右方向)(クイーンズランド州)
 -
 (R7-Q04) 指定時間バスレーン(クイーンズランド州)
 -
 (R8-1) 自転車専用
 -
 (R8-2) 自転車歩行者専用
 -
 (R8-3) 自転車と歩行者の分離
 -
 (R9-1-1) 規制時間(1設定)(転回禁止、左折禁止、右折禁止、直進せよの標識のみに使用)
 -
 (R9-1-2) 規制時間(2設定)(転回禁止、左折禁止、右折禁止、直進せよの標識のみに使用)
 -
 (R9-1-3) 終日
 -
 (R9-2) バスを除く
 -
 (R9-3) 自転車を除く
 -
 (R9-4) 許可車両を除く
 -
 (R9-6-1) 距離(メートル)(転回禁止、左折禁止、右折禁止、直進せよの標識のみに使用)
 -
 (R9-6-2) 距離(メートル)(転回禁止、左折禁止、右折禁止、直進せよの標識のみに使用)
 -
 (R9-7-1) 距離(キロメートル)(転回禁止、左折禁止、右折禁止、直進せよの標識のみに使用)
 -
 (R9-7-2) 距離(キロメートル)(転回禁止、左折禁止、右折禁止、直進せよの標識のみに使用)
 -
 (R9-8) 通りの名称
 -
 (R9-9) 一車線
 -
 (R9-233) 車線狭し(ニューサウスウェールズ州)
 -
 (R9-234) 滑りやすい(ニューサウスウェールズ州)
 -
 (R9-236) 踏切(ニューサウスウェールズ州)
 -
 (R9-Q01) バスとタクシーを除く(クイーンズランド州)
 -
 (R9-Q02) トラックを除く(クイーンズランド州)
 -
 (R9-Q03) 警察を除く(クイーンズランド州)
 -
 ランプ速度(クイーンズランド州)
 -
 Speed Limit in my Street(クイーンズランド州)


組み合わせ
-
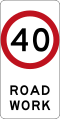
 道路工事中につき40km/h制限
 -
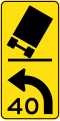
 側道40km/h制限(ビクトリア州)
 -
 新しい40km/h制限(南オーストラリア州)
 -
 橋上につき40km/h制限(南オーストラリア州)
 -
 新しい40km/h制限(ビクトリア州)
 -
 滑りやすし40km/h制限(南オーストラリア州)
 -
 踏切につき40km/h制限(南オーストラリア州)
 -
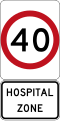 病院ゾーンにつき40km/h制限(クイーンズランド州)
 -
 ランプ40km/h制限(クイーンズランド州)
 -
 40km/h制限エリアここまで(60km/h制限ここから)(西オーストラリア州)
 -
 新しい40km/h制限エリア(南オーストラリア州)


警戒標識
-
 (W1-1) 屈折あり(左)
 -
 (W1-1) 屈折あり(右)
 -
 (W1-2) 背向屈折あり(左)
 -
 (W1-2) 背向屈折あり(右)
 -
 (W1-3) カーブ(左)
 -
 (W1-3) カーブ(右)
 -
 (W1-4) 背向屈折あり(左)
 -
 (W1-4) 背向屈折あり(右)
 -
 (W1-5) つづら折りあり
 -
 (W1-5) つづら折りあり
 -
 (W1-7) ヘアピンカーブあり(左)
 -
 (W1-7) ヘアピンカーブあり(右)
 -
 (W1-8) トラック横転注意、安全速度40km/h(左)
 -
 (W1-8) トラック横転注意、安全速度40km/h(右)
 -
 (W1-9-1) 出口ランプ安全速度
 -
 (W1-9-2) カーブあり、出口ランプ安全速度(左)
 -
 (W1-9-2) カーブあり、出口ランプ安全速度(右)
 -
 (W1-9-3) 屈曲あり、出口ランプ安全速度(左)
 -
 (W1-9-3) 屈曲あり、出口ランプ安全速度(右)
 -
 (W1-9-4) 背向屈曲あり、出口ランプ安全速度(左)
 -
 (W1-9-4) 背向屈曲あり、出口ランプ安全速度(右)
 -
 (W1-9-5) ヘアピンカーブあり、出口ランプ安全速度(左)
 -
 (W1-9-5) ヘアピンカーブあり、出口ランプ安全速度(右)
 -
 (W1-V50) ループ線あり(ビクトリア州)
 -
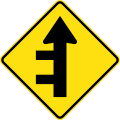
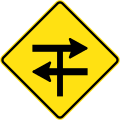
 (W2-1) 十字路あり
 -
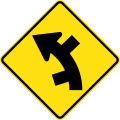
 (W2-3) 丁字路あり
 -
 (W2-4) 非主要道路との丁字路あり(左)
 -
 (W2-4) 非主要道路との丁字路あり(右)
 -
 (W2-7) この先ラウンドアバウトあり
 -
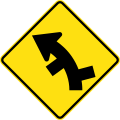
 (W2-8) 非主要道路との丁字路が続く
 -
 (W2-8) 非主要道路との丁字路が続く
 -
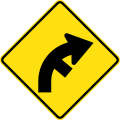
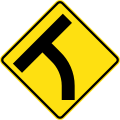
 (W2-9) 左カーブ、非主要道路との丁字路あり(右)
 -
 (W2-9) 右カーブ、非主要道路との丁字路あり(左)
 -
 (W2-10) 左カーブ、非主要道路との丁字路あり(左)
 -
 (W2-10) 右カーブ、非主要道路との丁字路あり(右)
 -
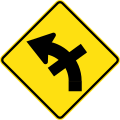
 (W2-11) 左カーブ、非主要道路との丁字路が続く
 -
 (W2-11) 右カーブ、非主要道路との丁字路が続く
 -
 (W2-12) 左カーブ、非主要道路との丁字路が続く
 -
 (W2-12) 右カーブ、非主要道路との丁字路が続く
 -
 (W2-13) 非主要道路との丁字路が続く(左)
 -
 (W2-13) 非主要道路との丁字路が続く(右)
 -
 (W2-14) 左カーブの先丁字路あり
 -
 (W2-14) 右カーブの先丁字路あり
 -
 (W2-15) 左カーブの先十字路あり
 -
 (W2-15) 右カーブの先十字路あり
 -
 (W2-16) 左カーブの前非主要道路との交差点あり
 -
 (W2-16) 右カーブの前非主要道路との交差点あり
 -
 (W2-V104) 左カーブ、十字路あり(ビクトリア州)
 -
 (W2-V104) 右カーブ、十字路あり(ビクトリア州)
 -
 (W2-V112-1) 中央分離帯のある道路との丁字路あり(ビクトリア州)
 -
 (W2-V112-1) 中央分離帯のある道路との十字路あり(ビクトリア州)
 -
 (W2-V116) 対向車注意(ビクトリア州)
 -
 (W2-208) 非優先道路との十字路あり(ニューサウスウェールズ州)
 -
 (W2-209) 非優先道路との丁字路あり(左)(ニューサウスウェールズ州)
 -
 (W2-209) 非優先道路との丁字路あり(右)(ニューサウスウェールズ州)
 -
 (W3-1) この先一時停止あり
 -
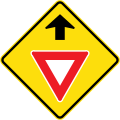 (W3-2) この先ゆずれあり
 -
 (W3-3) この先信号機あり
 -
 (W3-3) この先信号機あり
 -
 (W3-4) この先ハンプあり
 -
 (W3-V101) この先信号機あり、停止の準備をせよ (ビクトリア州、西オーストラリア州)
 -
 (W3-Q01) この先ランプメーター(英語版)、ラウンドアバウトメーターあり(クイーンズランド州)
 -
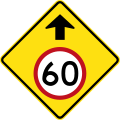 (MR-WDAD-2) この先制限速度(西オーストラリア州)
 -
![]])](//upload.wikimedia.org/wikipedia/commons/thumb/3/39/Australia_road_sign_MR-WDAD-5.svg/120px-Australia_road_sign_MR-WDAD-5.svg.png) ]])
]]) -
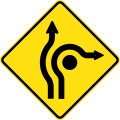
 (MR-WDAD-6) ラウンドアバウトの進行方法(西オーストラリア州、ダーウィン)
 -
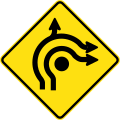
 (MR-WDAD-7) ラウンドアバウトの進行方法(西オーストラリア州)
 -
 (MR-WDAD-8) ラウンドアバウトの進行方法(西オーストラリア州)
 -
 (MR-WDAD-9) ラウンドアバウトの進行方法(西オーストラリア州)
 -
 (MR-WDAD-10) ラウンドアバウトの進行方法(西オーストラリア州)
 -
 (MR-WDAD-11) 進行方向別通行区分(西オーストラリア州)
 -
 (MR-WDAD-12) ラウンドアバウトの進行方法(西オーストラリア州)
 -
 (MR-WDAD-13) ラウンドアバウトの進行方法(西オーストラリア州)
 -
 (MR-WDAD-14) ラウンドアバウトの進行方法(西オーストラリア州)
 -
 (MR-WDAD-15) ラウンドアバウトの進行方法(西オーストラリア州)
 -
 (MR-WDAD-16) ラウンドアバウトの進行方法(西オーストラリア州)
 -
 (MR-WDAD-17) ラウンドアバウトの進行方法(西オーストラリア州)
 -
 (MR-WDAD-18) ラウンドアバウトの進行方法(西オーストラリア州)
 -
 (MR-WDAD-19) ラウンドアバウトの進行方法(西オーストラリア州)
 -
 (MR-WDAD-21) トラック通行止め(西オーストラリア州)
 -
 (MR-WDAD-23) この先トラック通行止め(西オーストラリア州)
 -
 (W4-1) 狭い橋あり
 -
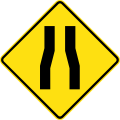 (W4-3) 幅員減少
 -
 (W4-4) 300mを超える中央分離帯による分割道路あり
 -
 (W4-5) 交通島あり
 -
 (W4-6) 分割道路ここまで
 -
 (W4-8) 高さ制限
 -
 (W4-9) 左車線減少
 -
 (W4-10) この先の車線割り当て
 -
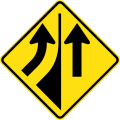
 (W4-11) 対面通行
 -
 (W4-V101) 進行方向別通行区分(ビクトリア州)
 -
 (W4-V102) この先の車線割り当て(ビクトリア州)
 -
 (W4-V106) 木の枝注意(ビクトリア州)
 -
 (W4-211) 高さ制限(ニューサウスウェールズ州)
 -
 (W4-Q01) Sレーン(第1車線を第2車線に合流させることで右折車線を生み出す)あり(クイーンズランド州)
 -
 (W5-1) フェリーの船着き場
 -
 (W5-2) 可動橋あり
 -
 (W5-6) 洗い越しあり
 -
 (W5-7-1) 冠水注意
 -
 (W5-7-2) 冠水注意
 -
 (W5-8) アンダーパス
 -
 (W5-9) 路面沈下あり
 -
 (W5-10) ハンプあり
 -
 (W5-11) クレスト(上り坂の頂上)あり
 -
 (W5-12) 急な下り坂
 -
 (W5-13) 急な上り坂
 -
 (W5-14) ゲートあり、開けたら閉めよ
 -
 (W5-16) グリット(家畜を外に出さないために設けられる金属などでできた格子)あり
 -
 (W5-18) 行き止まり
 -
 (W5-19) 砂利道
 -
 (W5-20) スリップ注意
 -
 (W5-22) トラック多し
 -
 (W5-25) 右左折者注意
 -
 (W5-29) カンガルー
 -
 (W5-30) 低空飛行の航空機に注意
 -
 (W5-31) Safety Ramp Crossing
 -
 (W5-33) 速度落とせ
 -
 (W5-34) 合流注意(左)
 -
 (W5-34) 合流注意(右)
 -
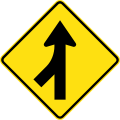
 (W5-35) 合流し車線が増える(左)
 -
 (W5-35) 合流し車線が増える(右)
 -
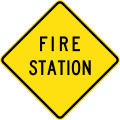 (W5-36) 消防署あり
 -
 (W5-37) 救急サービスの基地あり
 -
 (W5-38) 家畜の横断注意
 -
 (W5-41) 路面電車注意
 -
 (W5-42) 落石注意(左)
 -
 (W5-42) 落石注意(右)
 -
 (W5-43) 凹凸あり
 -
 (W5-44) ラクダ
 -
 (W5-45) エミュー
 -
 (W5-46) 馬
 -
 (W5-47) コアラ
 -
 (W5-48) ウォンバット
 -
 (W5-49) 野生動物に注意
 -
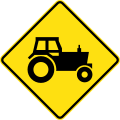 (W5-50) 農耕車に注意
 -
 (W5-SA63) 牛(西オーストラリア州)
 -
 (W5-SA70) 緊急車両に注意(西オーストラリア州)
 -
 (W5-SA72) トラック横転注意(左)(西オーストラリア州)
 -
 (W5-SA72) トラック横転注意(右)(西オーストラリア州)
 -
 (W5-SA74) 枝に注意(西オーストラリア州)
 -
 (W5-SA75) フォークリフトに注意(西オーストラリア州)
 -
 (W5-SA101) 横風注意(西オーストラリア州)
 -
 (W5-V102) 凹凸あり(ビクトリア州)
 -
 (W5-SA106) 動物注意(西オーストラリア州)
 -
 (W5-V106) 強風注意(ビクトリア州)
 -
 (W5-SA109) Creek (Used in South Australia)
 -
 (W5-V109) High Risk Area (Used in Victoria)
 -
 (W5-SA110) Creeks (Used in South Australia)
 -
 (W5-V110) Tram Speed (Used in Victoria and Gold Coast, Queensland)
 -
 (W5-SA111) Rocky Creek Bed Track (Used in South Australia)
 -
 (W5-V111) Equestrians (Used in Victoria)
 -
 (W5-SA112) Wildlife (Used in South Australia)
 -
 (W5-V116) Slippery When Icy (Used in Victoria)
 -
 (W5-V120) Wildlife Crossing (Used in Victoria)
 -
 (W5-V121) Emergency Vehicles (Used in Victoria)
 -
 (W5-V122) Fire Station (Prepare to Stop) (Used in Victoria)
 -
 (W5-V123) Slippery for Motorcycles (Used in Victoria)
 -
 (W5-V129) Slippery Road on Bridge When Icy (Used in Victoria)
 -
 (W5-V130) Rumble Strips (Used in Victoria)
 -
 (W5-V131) Stock Crossing Ahead (Used in Victoria)
 -
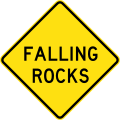
 (W5-V132) Falling Rocks (left) (Used in Victoria)
 -
 (W5-V132) Falling Rocks (right) (Used in Victoria)
 -
 (W5-V134) Deer (Used in Victoria)
 -
 (W5-204) Falling Rocks (Used in New South Wales)
 -
 (W5-226) Wind Gusts (Used in New South Wales)
 -
 (W5-232) Buses Turning (Used in New South Wales)
 -
 (W5-Q01) Start of Cane Railway Crossings (Used in Queensland)
 -
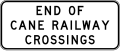 (W5-Q02) End of Cane Railway Crossings (Used in Queensland)
 -
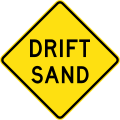 (W5-Q04) Drift Sand (Used in Queensland)
 -
 (W5-Q05) Soft Edges (Used in Queensland)
 -
 (W5-Q07) Cane Hauling Ahead (This flag is used with the guide sign sugar cane area.) (Used in Queensland)
 -
 (W5-Q09) Rumble Strips (Used in Queensland)
 -
 (W5-Q10) Unfenced Road (Watch for Wandering Animals) (Used in Queensland)
 -
 (MR-WDO-1) Road Hump with Advisory Speed (Used in Western Australia)
 -
 (MR-WDO-13) Strong Cross Winds (Used in Western Australia)
 -
 (MR-WDO-14) Rumble Strip (Used in Western Australia)
 -
 (W6-1) Pedestrians
 -
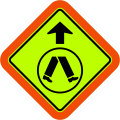
 (W6-2) Pedestrian Crossing Ahead
 -
 (W6-2) Pedestrian Crossing Ahead (with target board) (Used in Queensland)
 -
 (W6-V2-1) Pedestrian Crossing Ahead on Side Road (veer left) (Used in Victoria and Queensland)
 -
 (W6-V2-1) Pedestrian Crossing Ahead on Side Road (veer right) (Used in Victoria)
 -
 (W6-V2-2) Pedestrian Crossing Ahead on Side Road (turn left) (Used in Victoria)
 -
 (W6-V2-2) Pedestrian Crossing Ahead on Side Road (turn right) (Used in Victoria)
 -
 (W6-3) Children
 -
 (W6-3) Children (with target board) (Used in Queensland)
 -
 (W6-3) Children (Used in the Northern Territory)
 -
 (W6-4) School
 -
 (W6-4) School (with target board) (Used in Queensland)
 -
 (W6-4) School (Used in the Northern Territory)
 -
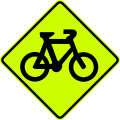 (W6-7) Cyclists
 -
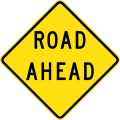 (W6-8) Road Ahead
 -
 (W6-9) Pedestrians and Cyclists
 -
 (W6-V9-2) Pedestrians, Cyclists and Equestrians (Used in Victoria)
 -
 (W6-V101) Cyclists (Used in Victoria)
 -
 (W6-V103) Steep Descent for Cyclists (Used in Victoria)
 -
 (W6-V104) Slippery for Cyclists (Used in Victoria)
 -
 (W6-V105) Pedestrian, Cyclist and Equestrian Crossing Ahead (Used in Victoria)
 -
 (W6-SA106) School Zone (Used in South Australia)
 -
 (W6-V106) School Bus Stop Ahead (Used in Victoria)
 -
 (W6-216-ACT) School Zone (Used in the Australian Capital Territory)
 -
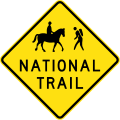 (W6-Q01) National Trail (Used in Queensland)
 -
 (W6-Q02) National Trail Road Crossing (Used in Queensland)
 -
 (W7-2) Number of Tracks
 -
 (W7-4) Railway Level Crossing with Flashing Signals ahead
 -
 (W7-7) Railway Level Crossing ahead (left)
 -
 (W7-7) Railway Level Crossing ahead (right)
 -
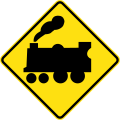
 (W7-8) Railway Level Crossing on Road ahead
 -
 (W7-9) Railway Level Crossing on Road ahead (skewed) (left)
 - (W7-9) Railway Level Crossing on Road ahead (skewed) (right)
-
 (W7-12) Railway Level Crossing on Side Road (left)
 -
 (W7-12) Railway Level Crossing on Side Road (right)
 -
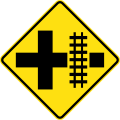
 (W7-13) Railway Level Crossing on Crossroad (left)
 -
 (W7-13) Railway Level Crossing on Crossroad (right)
 -
 (W7-15) Railway Gate
 -
 (W7-13) Railway Level Crossing on T-junction (left)
 -
 (W7-13) Railway Level Crossing on T-junction (right)
 -
 (W8-2) Advisory Speed
 -
 (W8-3) On Side Road (left)
 -
 (W8-3) On Side Road (right)
 - (W8-5) Metre plate
-
 (W8-V6) Kilometre plate (Used in Victoria)
 -
 (W8-8) When Wet
 -
 (W8-8) When Frosty
 -
 (W8-9) Under Snow
 -
 (W8-13) Playground
 -
 (W8-14) School
 -
 (W8-14) School (Used in the Northern Territory)
 -
 (W8-15) Merge Right
 -
 (W8-16) One Lane
 -
 (W8-17-1) Distance (in kilometres)
 -
 (W8-17-2) Distance (in metres)
 -
 (W8-18) Aged
 -
 (W8-19) Blind
 -
 (W8-20) Disabled
 -
 (W8-22) Crossing Ahead
 -
 (W8-23) Crossing Arrows
 -
 (W8-24) Preschool
 -
 (W8-25) Refuge Island
 -
 (W8-24) Preschool (Used in the Northern Territory)
 -
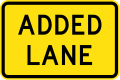 (W8-26) Added Lane
 -
 (W8-27) Prepare to Stop
 -
 (W8-28) Crossing Ramp
 -
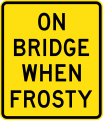 (W8-29) On Bridge When Frosty
 -
 (W8-SA54) Over Crest (Used in South Australia)
 -
 (W8-SA55) Mud on Road (Used in South Australia)
 -
 (W8-SA56) School Bus (Used in South Australia)
 -
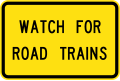 (W8-SA62) Watch for Road Trains (Used in South Australia)
 -
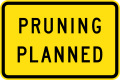 (W8-SA64) Prunning Planned (Used in South Australia)
 -
 (W8-SA65) On Green Signal (Used in South Australia)
 -
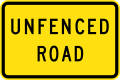 (W8-SA102) Unfenced Road (Used in South Australia)
 -
 (W8-V106) Crossing Ahead (Used in Victoria)
 -
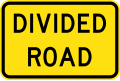 (W8-V107) Divided Road (Used in Victoria)
 -
 (W8-V112) Narrow Shoulder on Bridge (Used in Victoria)
 -
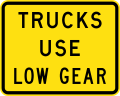 (W8-V116) Trucks use Low Gear (Used in Victoria)
 -
 (W8-V118) When Icy (Used in Victoria)
 -
 (W8-V121) Advisory Speed (Used in Victoria)
 -
 (W8-V122) On Bridge When Icy (Used in Victoria)
 -
 (W8-208) Limited Width Warning (Used in New South Wales)
 -
 (W8-212) High Wind Area (Used in New South Wales)
 -
 (W8-Q01) Cane Railway (A railway is used by sugar cane trains) (This warning sign is only used with Railway Level Crossing ahead) (Used in Queensland)
 -
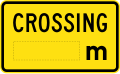
 (W8-Q02) Crossing Ahead (Used in Queensland)
 -
 (W8-Q03) Bus Stop (Used in Queensland)
 -
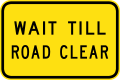 (W8-Q05) Wait Till Road Clear (Used in Queensland)
 -
 (W8-Q06) Watch for Traffic (Used in Queensland)
 -
 (W9-1) Modified side road intersection (left)
 -
 (W9-1) Modified side road intersection (right)
 -
 (W9-2) Modified T-junction (left)
 -
 (W9-2) Modified T-junction (right)
 -
 (W9-3) Modified crossroad intersection (left)
 -
 (W9-3) Modified crossroad intersection (right)


![]])](http://upload.wikimedia.org/wikipedia/commons/thumb/3/39/Australia_road_sign_MR-WDAD-5.svg/120px-Australia_road_sign_MR-WDAD-5.svg.png)


案内標識
Guide and information signs give directions and information for scenic tourist routes and destinations such as rest stops and fuel stations. They also provide additional traffic information to guide driving.
-
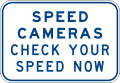 (G6-254) Speed Cameras Check Your Speed Now (Used in New South Wales)
 -
 (G6-327-1) Speed Camera (24 Hours) (Speed Limit) (Used in New South Wales)
 -
 (G6-327-1) Speed Camera (24 Hours) (Variable Speed Limit Enforced) (Used in New South Wales)
 -
 (G6-327-3) Speed Camera (24 Hours) (Speed Limits per Category) (Used in New South Wales)
 -
 (G6-328-1) Speed Camera Ahead (Speed Limit) (Used in New South Wales)
 -
 (G6-328-2) Speed Camera Ahead (Variable Speed Limit Enforced) (Used in New South Wales)
 -
 (G6-328-5) Speed Camera Ahead (Speed Limits per Category) (Used in New South Wales)
 -
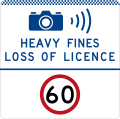 (G6-329-1) Speed Camera (Heavy Fines Loss of Licence) (Speed Limit) (Used in New South Wales)
 -
 (G6-329-2) Speed Camera (Heavy Fines Loss of Licence) (Variable Speed Limit Enforced) (Used in New South Wales)
 -
 (G6-329-3) Speed Camera (Heavy Fines Loss of Licence) (Speed Limits per Category) (Used in New South Wales)
 -
 (G6-330-1) Speed Camera in Tunnel Ahead (Speed Limit) (Used in New South Wales)
 -
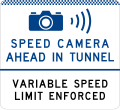 (G6-330-2) Speed Camera in Tunnel Ahead (Variable Speed Limit Enforced) (Used in New South Wales)
 -
 (G6-331-1) Speed Camera in Tunnel (24 Hours) (Speed Limit) (Used in New South Wales)
 -
 (G6-331-2) Speed Camera in Tunnel (24 Hours) (Variable Speed Limit Enforced) (Used in New South Wales)
 -
 (G6-332) School Zone Ahead (Used in New South Wales)
 -
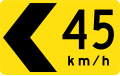
 (G9-9) Reduce Speed
 -
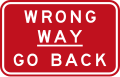 (G9-69) Wrong Way - Go Back
 -
 (G9-79) 10 km/h Speed Limit Ahead
 -
 (G9-79) 20 km/h Speed Limit Ahead
 -
 (G9-79) 25 km/h Speed Limit Ahead
 -
 (G9-79) 30 km/h Speed Limit Ahead
 -
 (G9-79) 40 km/h Speed Limit Ahead
 -
 (G9-79) 50 km/h Speed Limit Ahead
 -
 (G9-79) 60 km/h Speed Limit Ahead
 -
 (G9-79) 70 km/h Speed Limit Ahead
 -
 (G9-79) 75 km/h Speed Limit Ahead
 -
 (G9-79) 80 km/h Speed Limit Ahead
 -
 (G9-79) 90 km/h Speed Limit Ahead
 -
 (G9-79) 100 km/h Speed Limit Ahead
 -
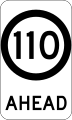 (G9-79) 110 km/h Speed Limit Ahead
 -
 (G9-82) Steep Descent
 -
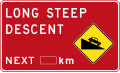 (G9-83) Long Steep Descent
 -
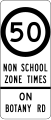 (G9-375) Speed Limit during Non-School Zone times (Used in New South Wales)
 -
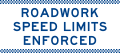
 (G9-380) Speed Limits Enforced (Used in New South Wales)
 -
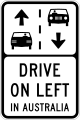 (G9-V170) A sign reminding motorists that traffic in Australia travels along the left side of the road. These signs are placed in areas with high tourist traffic, such as roadways near airports.


高速道路の案内標識
-
 (GE2-3) Exit
 -
 (GE2-4) Exit (with supplementary number)
 -
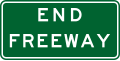
 (GE6-9) End Freeway 2 km
 -
 (GE6-10) End Freeway 1 km
 -
 (GE9-3) Reduce Speed Now
 -
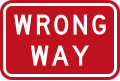 (GE9-15) Wrong Way
 -
 (GE9-23) Emergency Median Crossing


Hazard markers indicate the direction to take when approaching the obstacle or driving past the hazard. Drivers must obey these signs.
-
 (D4-1-1) Left marker (Used at curves or roundabouts)
 -
 (D4-1-1) Right marker (Used at curves)
 -
 (D4-1-1-Q01) Left marker (Used at curves or roundabouts) (Used in Queensland)
 -
 (D4-1-1-Q01) Right marker (Used at curves) (Used in Queensland)
 -
 (D4-1-2) Island marker (left)
 -
 (D4-1-2) Island marker (right)
 -
 (D4-2-2) Pass either side
 -
 (D4-2-2-Q01) Pass either side (Used in Queensland)
 -
 (D4-2-3) End of road marker (Used at T-junctions)
 -
 (D4-2-3) End of road marker (double) (Used at T-junctions)
 -
 (D4-3) Narrow marker (left)
 -
 (D4-3) Narrow marker (right)
 -
 (D4-6) Curve marker (left)
 -
 (D4-6) Curve marker (right)
 -
 (D4-V105) Pass either side (Used in Victoria)
 -
 End of road marker (Used at T-junctions) (Used in Victoria)
 -
 (D4-V110) Curve marker with Advisory Speed (left) (Used in Victoria)
 -
 (D4-V110) Curve marker with Advisory Speed (right) (Used in Victoria)


道路工事用標識
Roadwork signs to keep you informed of changing conditions and to keep road workers safe.
-
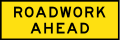 (T1-1) Roadwork Ahead
 -
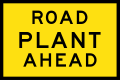 (T1-3-1) Road Plant Ahead
 -
 (T1-5) Workers Ahead
 -
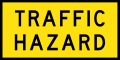 (T1-10) Traffic Hazard
 -
 (T1-16) Roadwork 1 km ahead
 -
 (T1-18) Prepare to Stop
 -
 (T1-30) Traffic Signals
 -
 (T1-31) Roadwork Ahead
 -
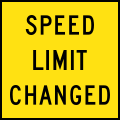 (T1-SA109) Speed Limit Changed (Used in South Australia)
 -
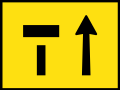 (T2-6-1) Lane Status
 -
 (T2-6-2) Lane Status
 -
 (T2-16) End Roadwork
 -
 (T2-17) End Roadwork
 -
 (T3-3) Slippery Road
 -
 (T3-9) Loose Gravel
 -
 (T4-216N) Roadwork Speed Limits Enforced (Used in New South Wales)
 -
 (T7-1) Slow


脚注
参考文献
- Regulatory signs | Transport and motoring | Queensland Government クイーンズランド州、2020年12月13日閲覧。
- Road User's Handbook - Japanese ニューサウスウェールズ州、2020年12月13日閲覧。
- オーストラリアドライブ・オーストラリアレンタカーの基本情報|地球の歩き方 株式会社 地球の歩き方メディアパートナーズ、2020年12月13日閲覧。


